Integration
Windows Devices
This guide will assist you in connecting to ProxyGuys' top-tier proxy services on your Windows system, ensuring secure and rapid internet browsing while enhancing online security and enabling access to restricted websites.
Automatic configuration of the proxy server in Windows
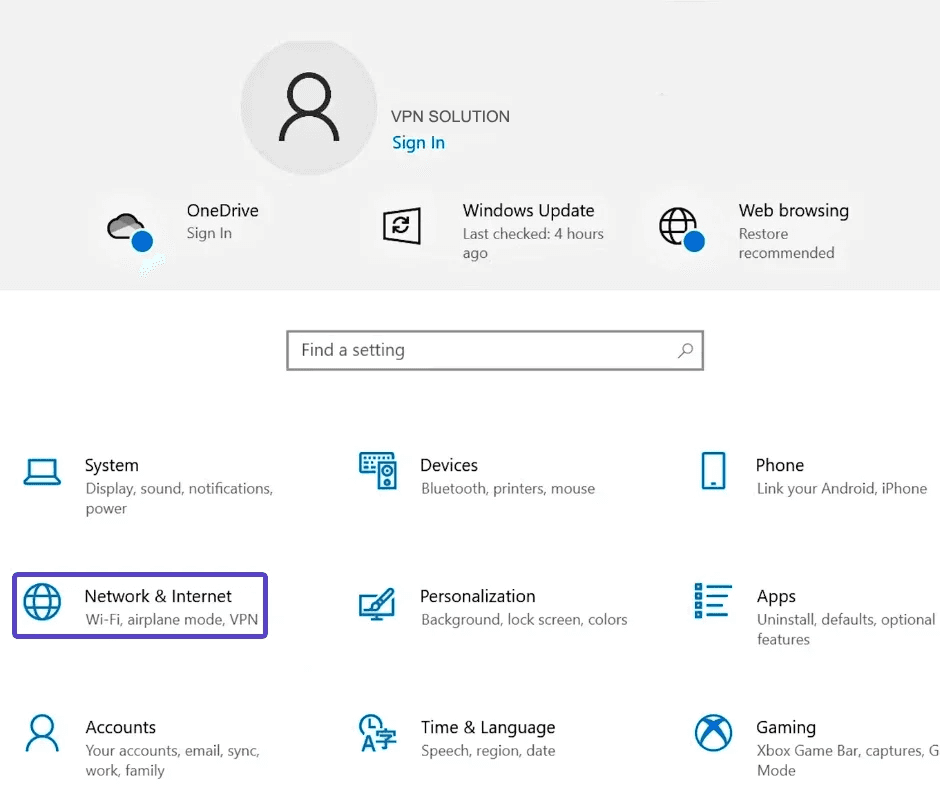
To access network settings, click the Start button and navigate to Settings > Network & Internet.
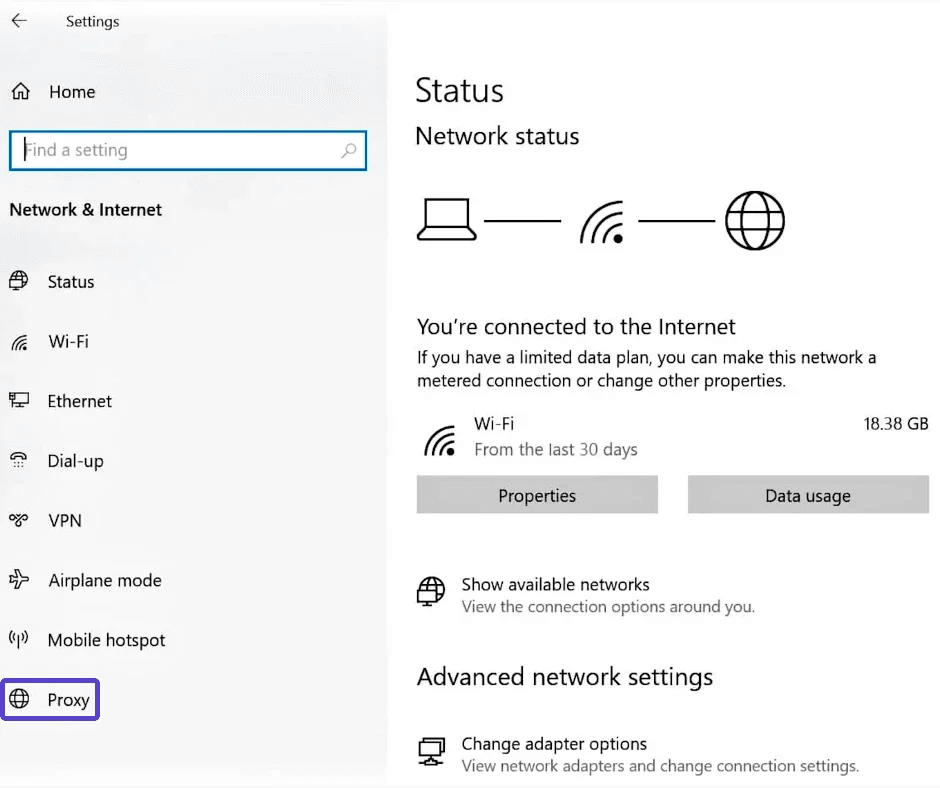
In the left panel, select the "Proxy" option.
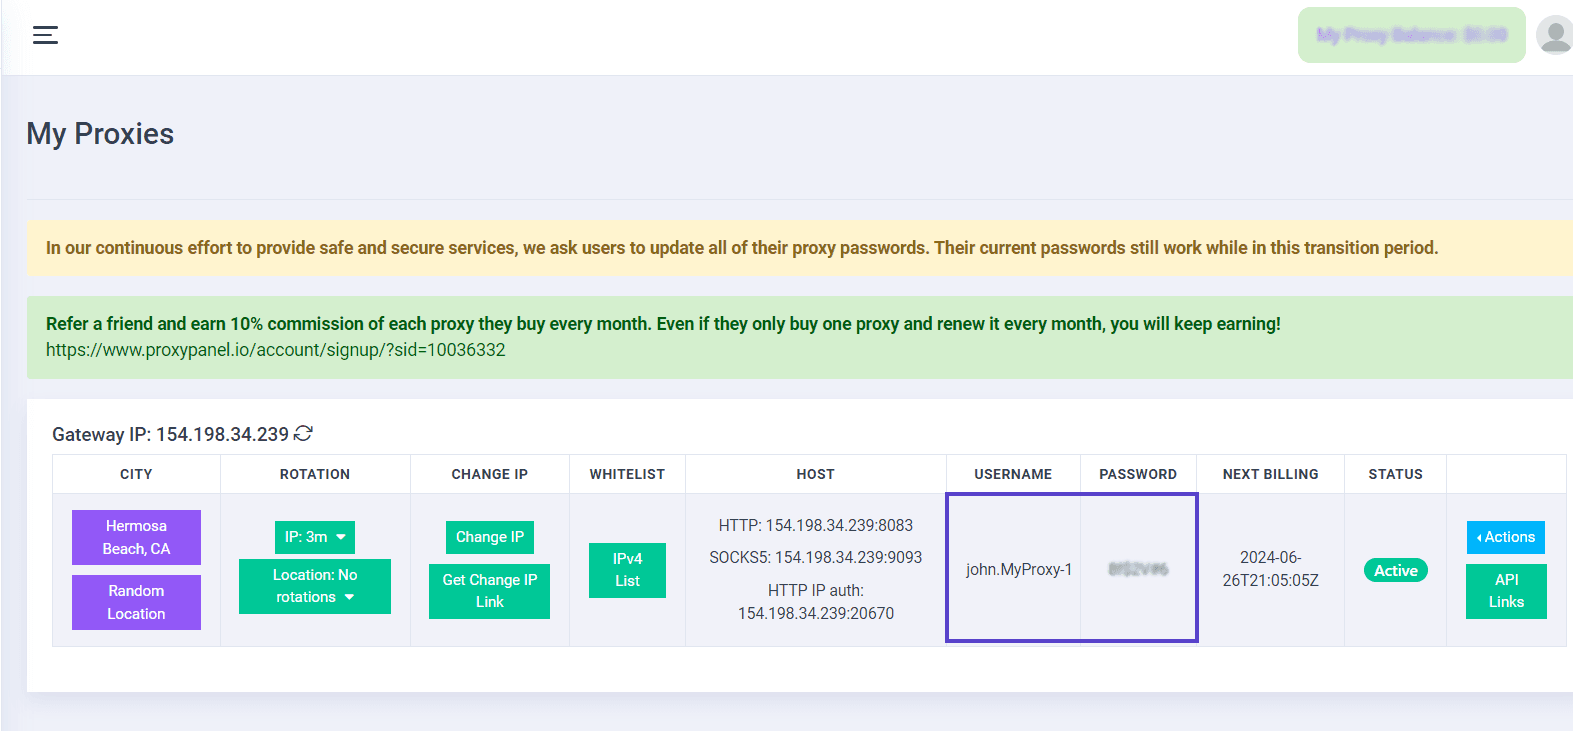
Go to your Dashboard panel and navigate to the "My Proxy" section to view your IP information.
Click on the "Show Password" button and enter your account password to display your proxy password.
In the proxy settings window, locate the Manual proxy setup section. Ensure that the switch for "Use a proxy server" is toggled on. Then, input the desired endpoint in the Address and Port fields. Finally, click on Save to apply the changes.
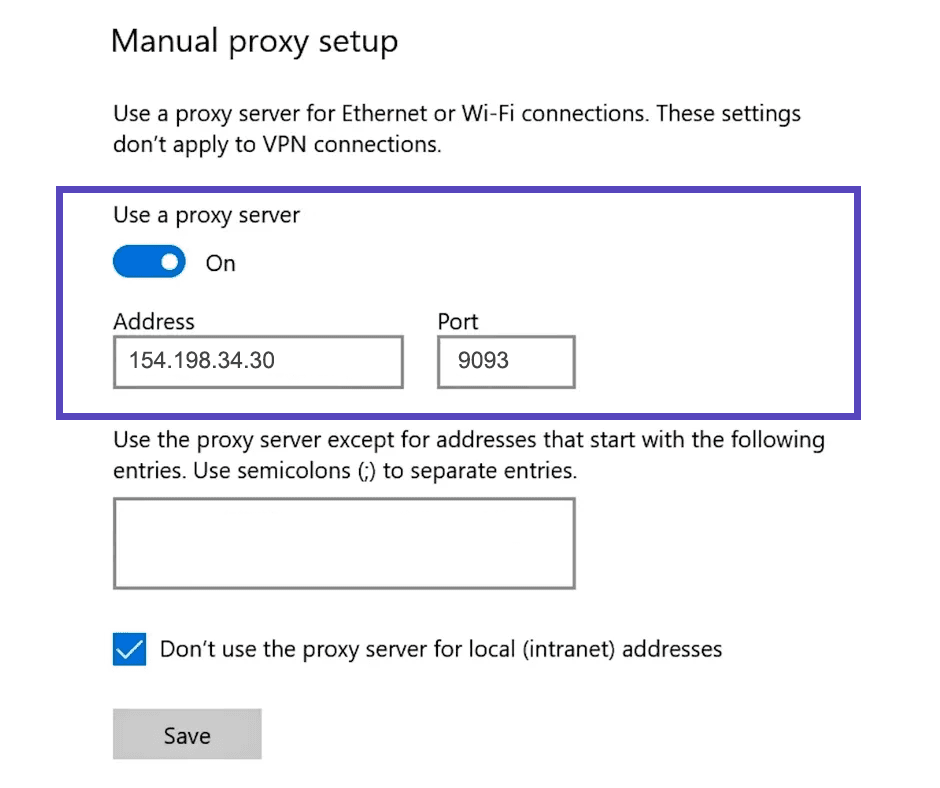
Manually Configure the Proxy Server
As we've seen with automatic configuration, there's an alternative method for setting up proxies manually. This section will guide you through the process of manually configuring proxy settings on your Windows system, providing you with greater control and customization over your proxy setup.
Click on Control Panel > Network and Internet > Internet Options.
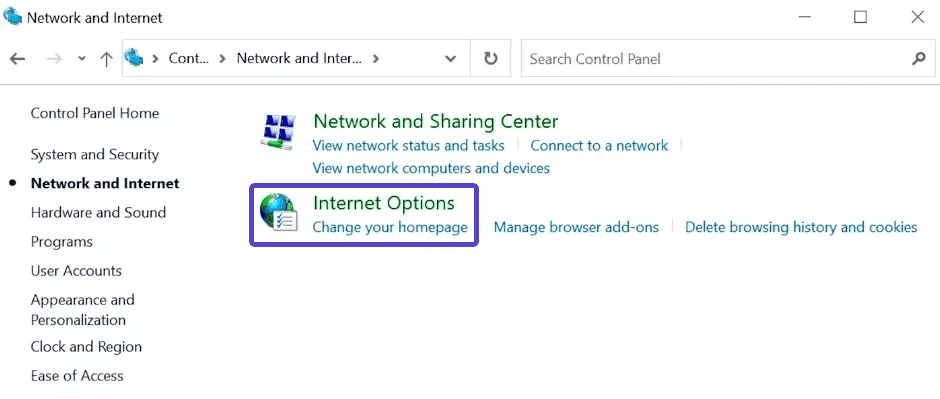
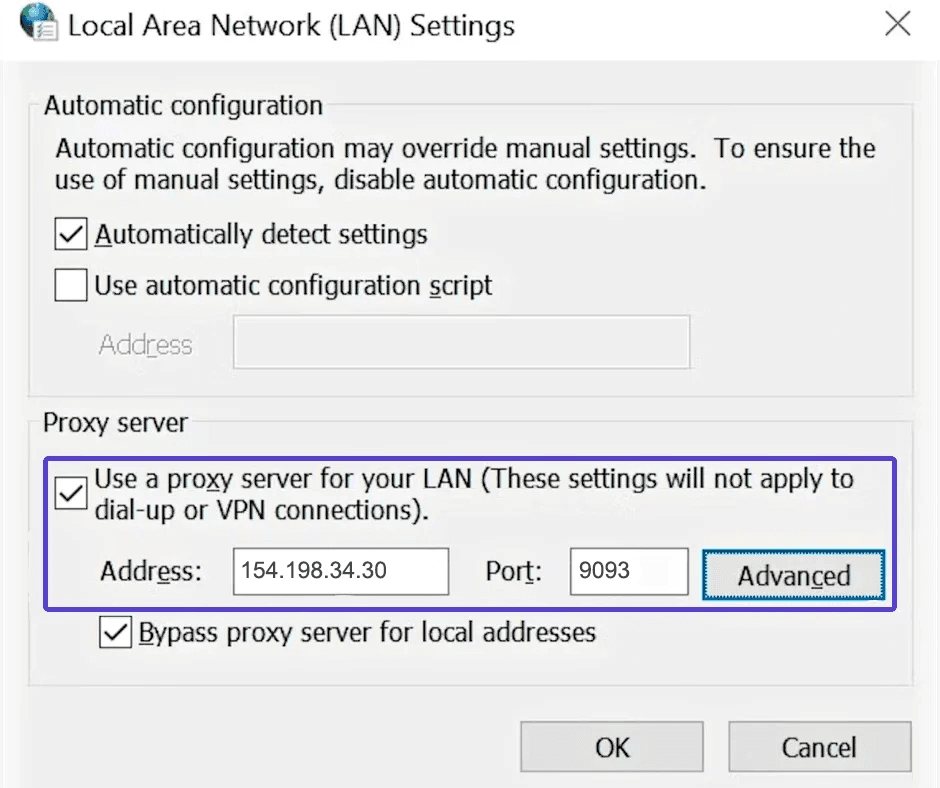
In the Internet Properties window, select the Connections tab and click LAN settings.
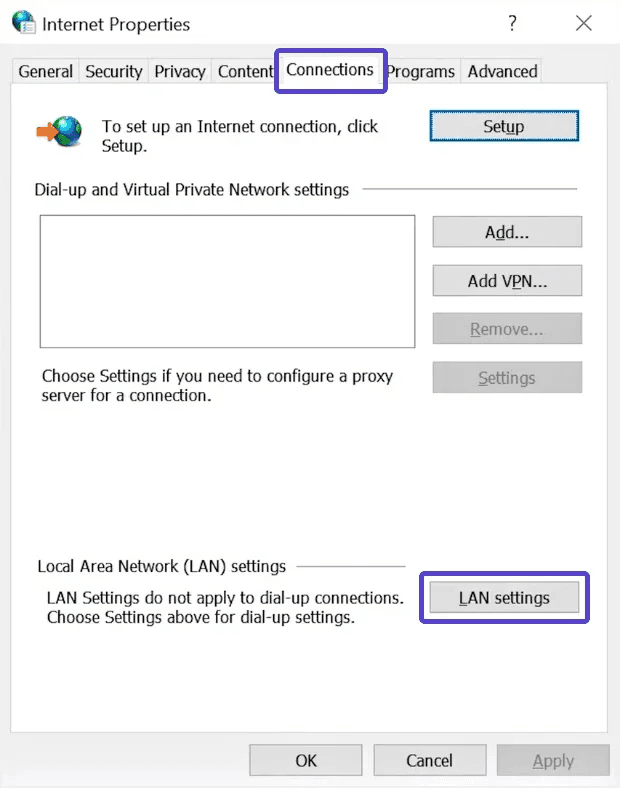
Enable "Use a proxy server for your LAN," enter the IP address and port of the proxy server, then click "OK."